
How to Fix a 500 Internal Server Error in WordPress
A 500 Internal Server Error can occur on a WordPress site for many different reasons. This error can easily frustrate a website owner as it is very generic, yet also happens to be one of the most common errors a WordPress site experiences. Below are useful tips to remember before troubleshooting a broken WordPress site:
- Review each troubleshooting method to get a WordPress site working again. You may need to perform multiple steps to get a site functional again. (Disable plugins & your theme for example.)
- When disabling a configuration file like an .htaccess file, check directories above your webroot and disable ones above too when troubleshooting.
- Always backup your website before replacing any files.
Let’s dive into common reasons why this error occurs and how to fix it with this 500 Internal Server Error troubleshooting guide.
What is a 500 Internal Server Error?
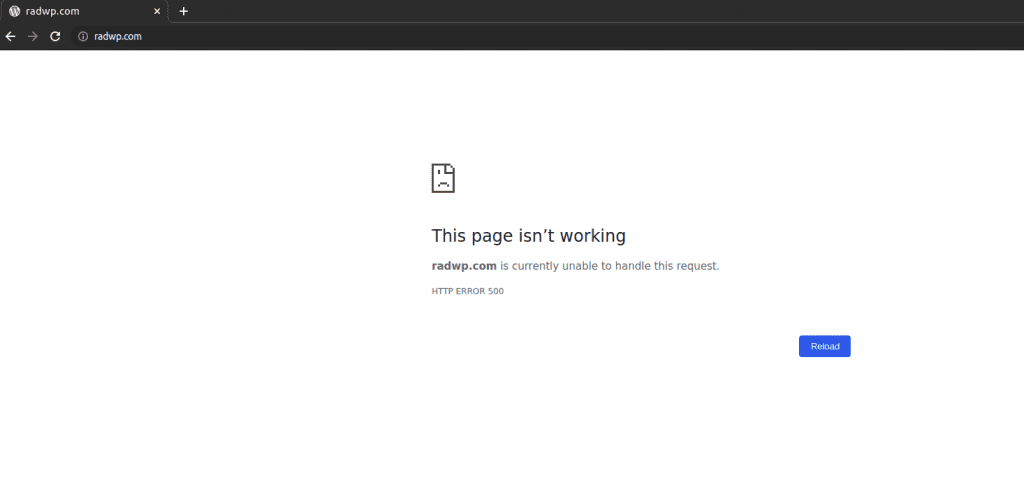
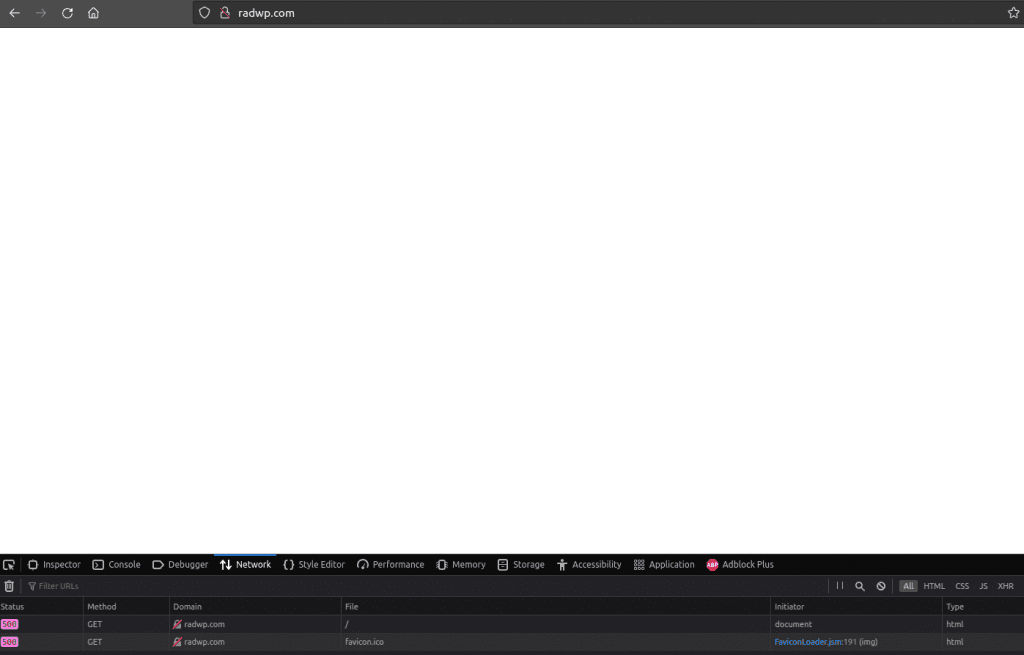
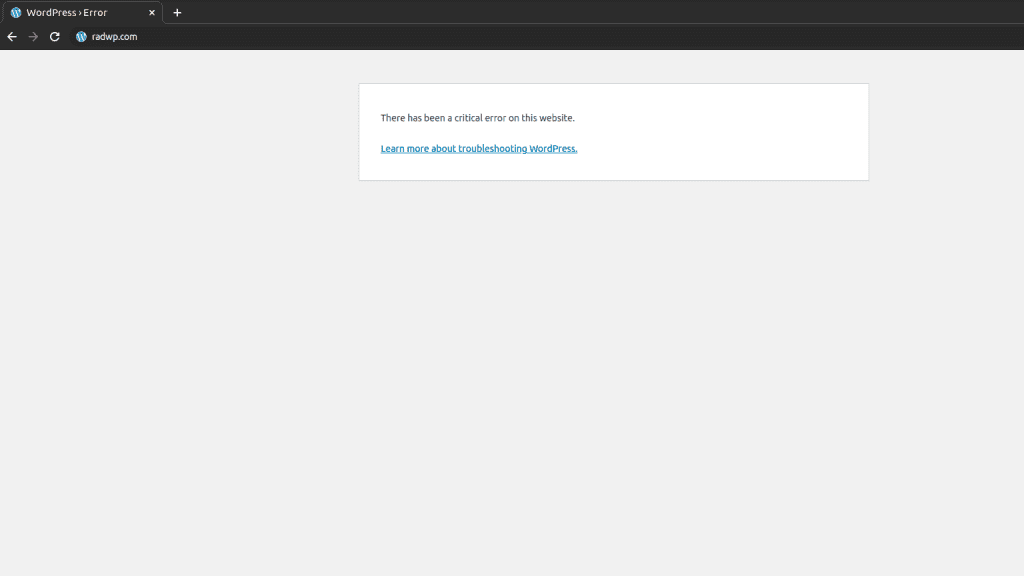
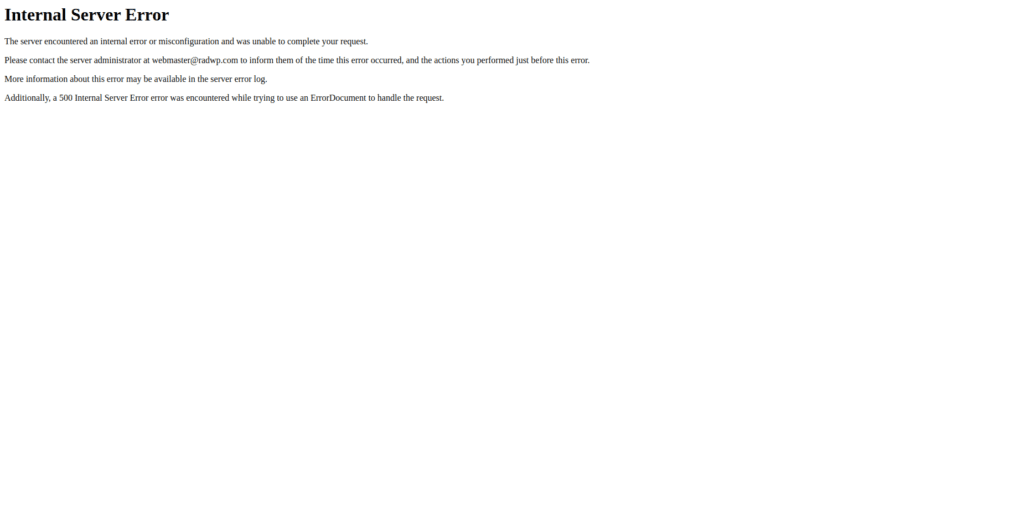
A 500 Internal Server Error is a generic response a hosting server sends back when it cannot load a site, and is unsure of the error or reason why the site can’t be loaded. The error will be displayed in different ways depending on the browser used, but it will mean the same thing across any computer and browser: The hosting server encountered a problem when attempting to load the WordPress site but is unsure what that exact problem is. Here are examples of what this can look like:
There are many reasons a WordPress site can fall victim to this error. One of the most frustrating things for website owners is the lack of information provided when a site breaks and loads to a 500 error. In most cases, no error is displayed giving clues as to how the site broke, leaving website owners frustrated and not sure where to turn. Fortunately, there are mechanisms within WordPress that can help narrow down this error to make addressing the issue easier.
What causes a 500 Internal Server Error?
Because a 500 Internal Server Error is a generic response, there are many different reasons a site may succumb to this error. WordPress is a powerful CMS where many plugins & themes can be added to make each site unique; this also creates more entry points and room for errors to occur. A 500 Internal Server Error can occur for the following reasons:
- Plugin conflicts (Jump to Section)
- Theme conflicts (Jump to Section)
- .php.ini/.user.ini file issues (Jump to Section)
- .htaccess/web.config file issues (Jump to Section)
- Corrupted core files (Jump to Section)
- PHP memory limit problems
Above are common examples as to what causes this error to occur on a WordPress site. Let’s move on to the next section to review how to troubleshoot this error to determine where this issue stems from.
How to find the cause of a 500 Internal Server Error
A 500 Internal Server Error is frustrating to deal with because little information is provided as to why the site is not loading. Fortunately, WordPress has a mechanism built into itself that allows a website owner to find more information as to why their site is down.
ENABLING DEBUG MODE:
Within the wp-config.php file, there is a mechanism called DEBUG Mode. Once switched from false to true, a WordPress installation will display any applicable errors to the CMS at the top of the screen. This is very useful in finding the cause of many errors, including a 500 Internal Server Error.
Below is a sample wp-config.php file. This file is found in a WordPress site’s webroot within the hosting it resides in:
<?php
/**
 * The base configuration for WordPress
 *
 * The wp-config.php creation script uses this file during the installation.
 * You don't have to use the web site, you can copy this file to "wp-config.php"
 * and fill in the values.
 *
 * This file contains the following configurations:
 *
 * * Database settings
 * * Secret keys
 * * Database table prefix
 * * ABSPATH
 *
 * @link https://wordpress.org/support/article/editing-wp-config-php/
 *
 * @package WordPress
 */
// ** Database settings - You can get this info from your web host ** //
/** The name of the database for WordPress */
define( 'DB_NAME', 'database_name_here' );
/** Database username */
define( 'DB_USER', 'username_here' );
/** Database password */
define( 'DB_PASSWORD', 'password_here' );
/** Database hostname */
define( 'DB_HOST', 'localhost' );
/** Database charset to use in creating database tables. */
define( 'DB_CHARSET', 'utf8' );
/** The database collate type. Don't change this if in doubt. */
define( 'DB_COLLATE', '' );
/**#@+
 * Authentication unique keys and salts.
 *
 * Change these to different unique phrases! You can generate these using
 * the {@link https://api.wordpress.org/secret-key/1.1/salt/ WordPress.org secret-key service}.
 *
 * You can change these at any point in time to invalidate all existing cookies.
 * This will force all users to have to log in again.
 *
 * @since 2.6.0
 */
define( 'AUTH_KEY',         'put your unique phrase here' );
define( 'SECURE_AUTH_KEY',  'put your unique phrase here' );
define( 'LOGGED_IN_KEY',    'put your unique phrase here' );
define( 'NONCE_KEY',        'put your unique phrase here' );
define( 'AUTH_SALT',        'put your unique phrase here' );
define( 'SECURE_AUTH_SALT', 'put your unique phrase here' );
define( 'LOGGED_IN_SALT',   'put your unique phrase here' );
define( 'NONCE_SALT',       'put your unique phrase here' );
/**#@-*/
/**
 * WordPress database table prefix.
 *
 * You can have multiple installations in one database if you give each
 * a unique prefix. Only numbers, letters, and underscores please!
 */
$table_prefix = 'wp_';
/**
 * For developers: WordPress debugging mode.
 *
 * Change this to true to enable the display of notices during development.
 * It is strongly recommended that plugin and theme developers use WP_DEBUG
 * in their development environments.
 *
 * For information on other constants that can be used for debugging,
 * visit the documentation.
 *
 * @link https://wordpress.org/support/article/debugging-in-wordpress/
 */
define( 'WP_DEBUG', false );
/* Add any custom values between this line and the "stop editing" line. */
/* That's all, stop editing! Happy publishing. */
/** Absolute path to the WordPress directory. */
if ( ! defined( 'ABSPATH' ) ) {
	define( 'ABSPATH', __DIR__ . '/' );
}
/** Sets up WordPress vars and included files. */
require_once ABSPATH . 'wp-settings.php';
To enable DEBUG Mode, change the following section from false:
define( 'WP_DEBUG', false ); To true:
define( 'WP_DEBUG', true ); Now reload the site and see if an error displays at the top. If there is an error, you can move onto one of the applicable next sections to resolve the issue.
What if no error displays when enabling DEBUG Mode? This can happen often if the issue is related to corrupted core files, php.ini file issues, and more. Let’s review other ways to find the cause of a 500 Internal Server error.
REVIEWING THE SERVER ERROR_LOG:
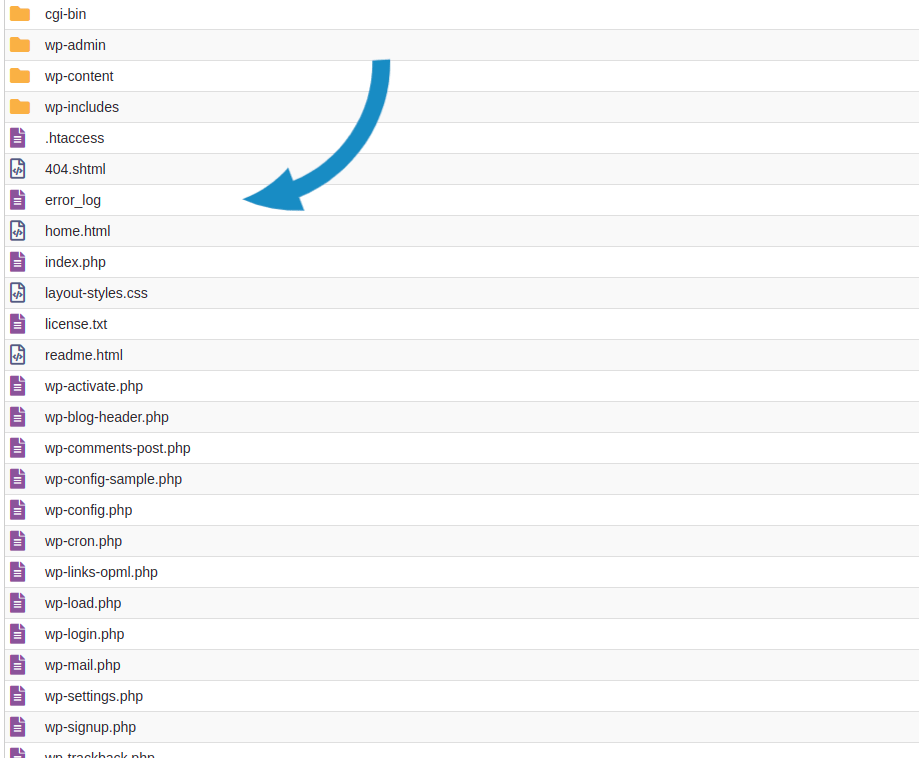
Hosting servers will have an error log housed somewhere within a hosting platform that will (in most cases) be written to whenever an error is triggered on a WordPress site. This log is a great resource to review if DEBUG Mode fails to display an error. Depending on the hosting provider and hosting service utilized, the error log may be in different locations. For example, when using the hosting service cPanel, the error_log will be in the webroot of a WordPress site, like so:
Both methods of finding an error are extremely useful when troubleshooting a WordPress site. In some cases, no errors are produced, even after enabling DEBUG Mode and reviewing the hosting server log. If that is the case, the WordPress site can still be fixed! (It will just take patience.)
Let’s move on to the next section to find out how to troubleshoot and fix various issues that would cause a 500 Internal Server Error to occur.
500 Internal Server Error caused by a plugin
A WordPress site can be composed of many different plugins to add features and make it unique. These plugins are often created by different developers. While utilizing plugins to add features to a WordPress site can be useful when developing, sometimes these plugins can become corrupted or conflict with other plugins, a hosting environment, or with an active theme. Often times a 500 Internal Server Error will occur due to a plugin issue. Let’s dive into the next steps to troubleshoot and fix a plugin conflict on a WordPress site.
PLUGIN ERROR IS GENERATED:
After following the steps above on how to find the cause of a 500 error, your broken WordPress site may display errors relevant to the plugin causing an issue. In the example below, an error regarding a plugin is displayed after enabling DEBUG Mode:
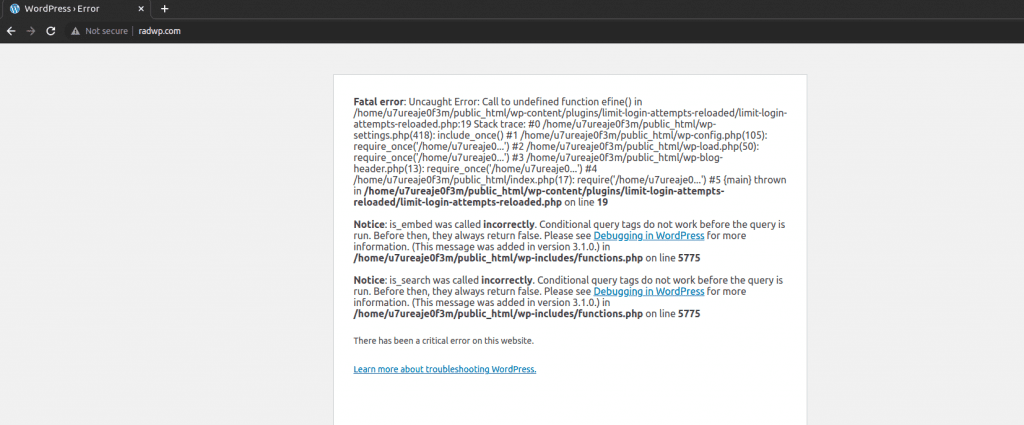
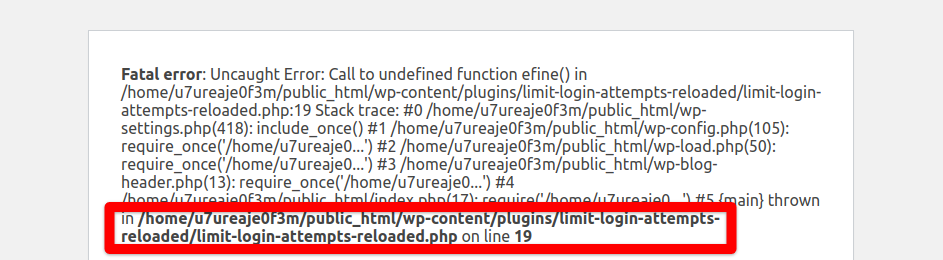
The important error to pay attention to is the PHP Fatal error displayed at the top. There will be a file path displayed at the bottom of the error in bold. This file path will provide a clue as to what plugin is causing the WordPress site to load to a 500 Internal Server Error. In the example below, the plugin causing an issue is the Limit Login Attempts Reloaded plugin:
If you narrowed down the error by reviewing the error_log, you will see an error similar to this one:

The easiest way to disable a plugin is from the WordPress dashboard, however, when a 500 Internal Server Error is generated, the dashboard is most likely inaccessible. The best way to disable the faulty plugin is to log into your file structure through your hosting provider and disable it there. You can log in via FTP with a FTP client like Filezilla, or you can log into your hosting provider and utilize the server’s file manager if applicable.
Once logged into the WordPress file structure, navigate to the site’s webroot and load the following path:
wp-content/plugins/ Once entered into the plugins directory, find the plugin name that matches the path of the error thrown and rename the folder to something different. In the example above, the faulty plugin is Limit Login Attempts Reloaded.
To disable this plugin, rename the directory like so:
wp-content/plugins/limit-login-attempts-reloaded.bak Reload the WordPress site after renaming the faulty plugin folder. The site will load again and the dashboard will be accessible. The faulty plugin will be disabled, meaning it will not be in use on the WordPress site. If the plugin is needed for the functionality of the site, it can be reinstalled. If it is not needed, it can be fully deleted or left deactivated. (Make sure to always have a working backup of your site before deleting anything!)
Enabling DEBUG Mode and reviewing the error_log may not always produce errors and therefore not narrow down the culprit. A 500 Internal Server Error can still be caused by a faulty plugin even without an error produced.
In this case, instead of disabling the exact plugin causing an issue, the entire plugins directory can be disabled. This will disable all plugins which will allow you back into the dashboard. To do this, navigate to the site’s file structure and load this path:
wp-contentOnce entered into the wp-content directory, find the directory plugins and rename it to something different, like so:

Once the plugins directory is disabled, load the dashboard and activate each plugin one by one until the site goes down again. Note down which plugin causes the site to go down & disable the entire plugins directory again. Log back into the WordPress dashboard and activate all other plugins excluding the faulty plugin until all are activated again. From there you can decide whether to troubleshoot the faulty plugin further or remove it if it is unnecessary for the functionality of your site.
500 Internal Server Error caused by a theme
WordPress themes are typically designed by third party developers just like plugins are. These themes can malfunction for many reasons, and can often times cause a WordPress site to load to a 500 Internal Server Error making the site and dashboard inaccessible. Let’s review how to gain access back into the dashboard when the theme causes it to become inaccessible.
THEME ERROR IS GENERATED:
After following the steps in the Find the cause of a 500 error section to enable DEBUG Mode and review the server’s error log, a theme error might appear on your broken WordPress site. In the example below, the path of the theme can be seen in the PHP error thrown:
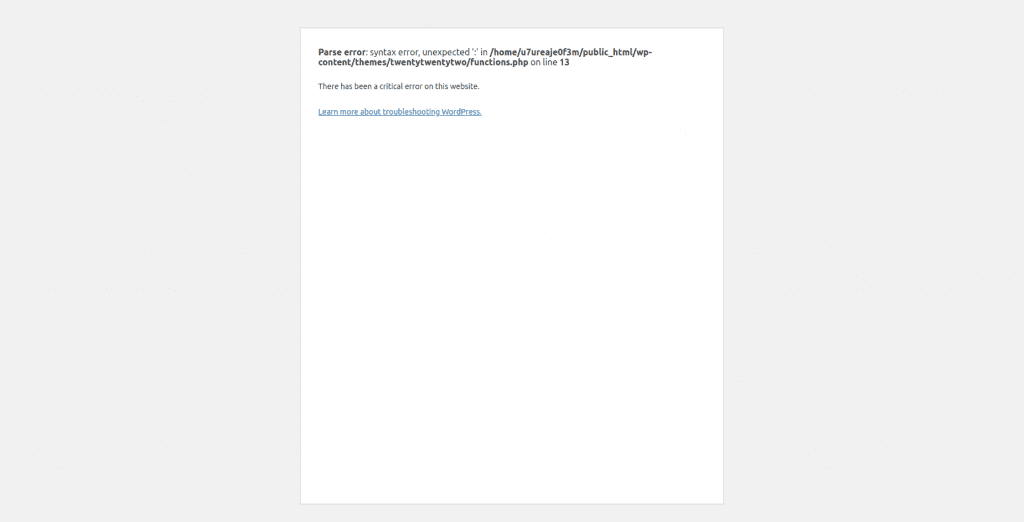
The important error to pay attention to is the error displayed at the top. There will be a file path displayed at the bottom of the error in bold. This file path will provide a clue as to what theme is causing the WordPress site to load to a 500 Internal Server Error. In the example below, the theme causing an issue is the Twentytwentytwo theme:

If you narrowed down the error by reviewing the error_log, you will see an error similar to this one:

The next step is to disable the corrupted theme and activate a functional, default WordPress theme. Disabling a corrupted theme is a different process than disabling a broken plugin. You will need access to software that allows you to manage the WordPress database. The two recommended pieces of software that allow you to do this are Adminer and PHPMyAdmin.
Adminer is one single PHP file that can be uploaded into your file structure to allow access to a WordPress dashboard.
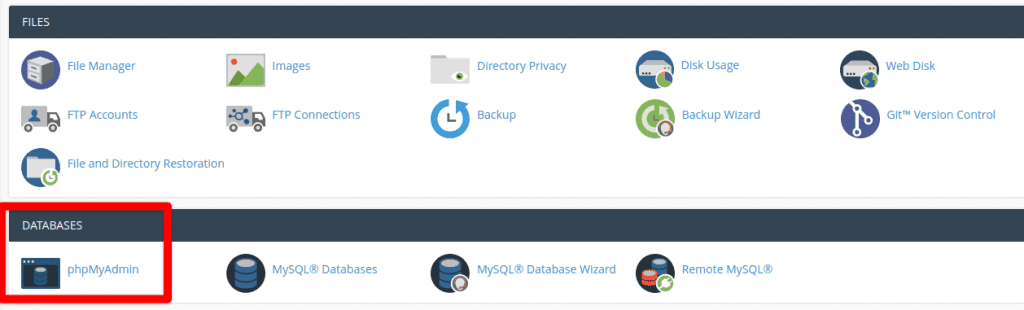
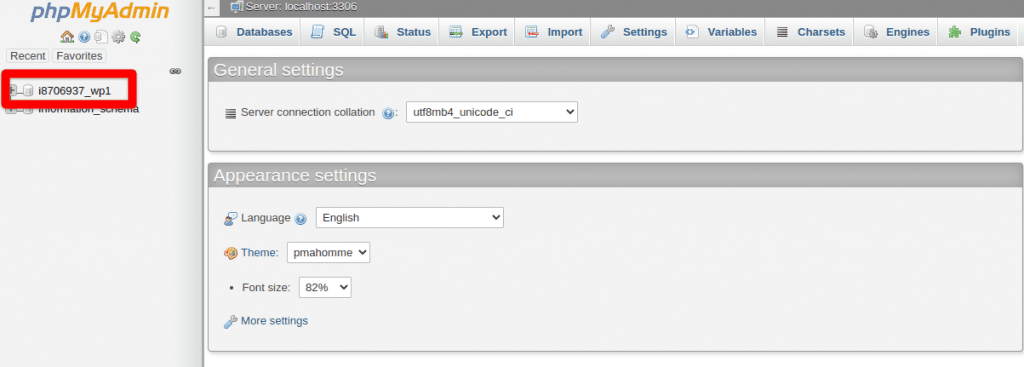
PHPMyAdmin may already be installed on your hosting control panel configured by your hosting provider. For example, if you are utilizing cPanel for hosting, PHPMyAdmin can be found here:
Once you are logged in, you will see the WordPress database to the left like so:
Click the plus sign to the left of the database name, which will expand the database to display its tables:
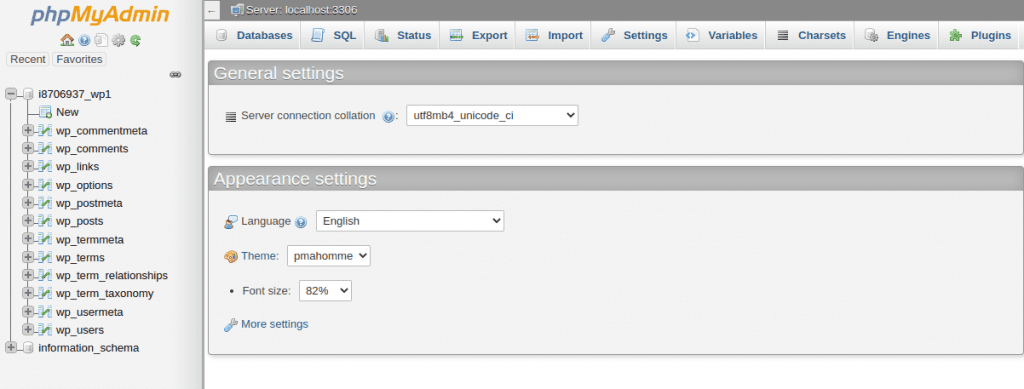
Next, click on the database table named wp_options. Sometimes WordPress sites are setup to utilize custom database prefixes. The standard is wp_, but yours may be something different. The important part on this step is to make sure to click on the table that ends in _options.
After the wp_options table is selected, navigate to the Search functionality. Four search boxes will appear in the middle of the screen, like so:
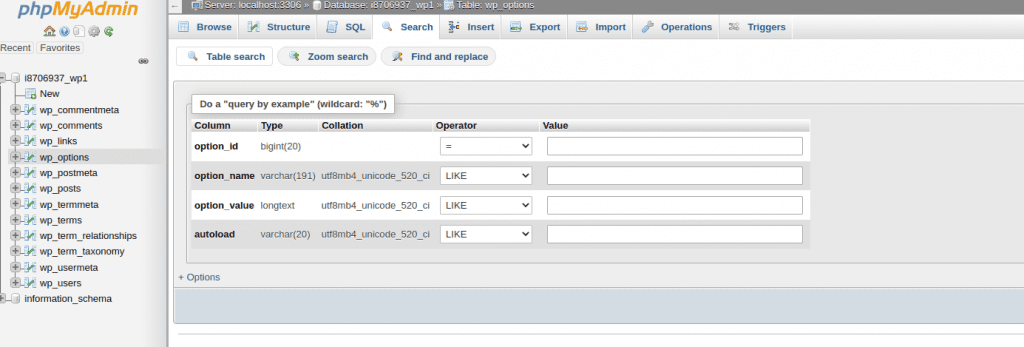
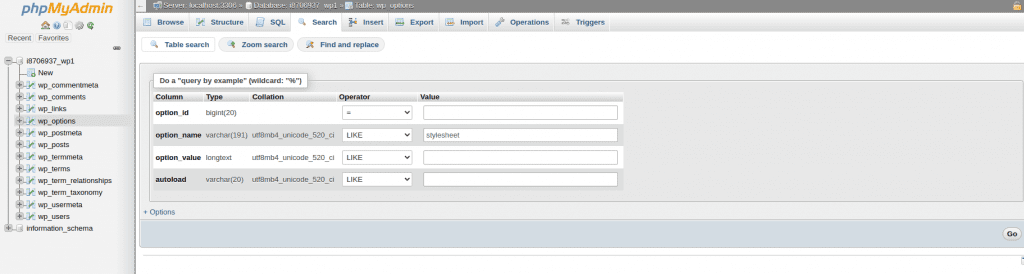
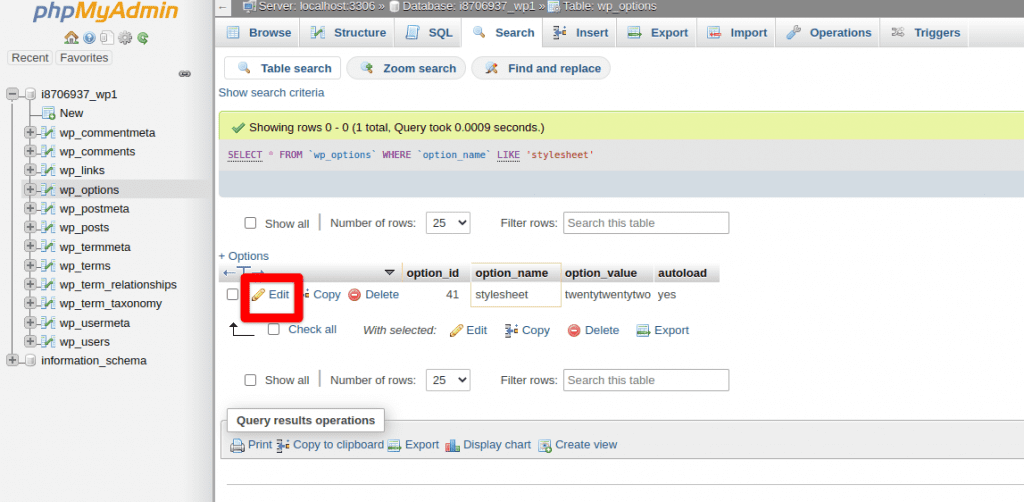
In the Value box for option_name, first type in stylesheet, then Go. You will then see the first row appear with your theme name in the option_value field. Click the Edit with the pencil icon to change the theme through the database:
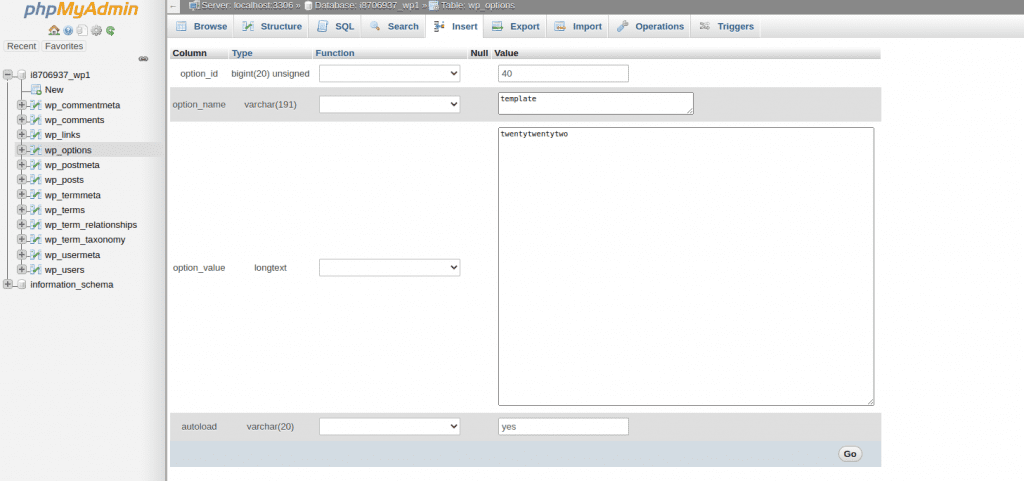
After the pencil icon is clicked, change the text in the option_value box to a default theme. The naming convention for a default WordPress theme will be spelled out with no spaces. For example, if utilizing the default 2022 WordPress theme, write the text as so:
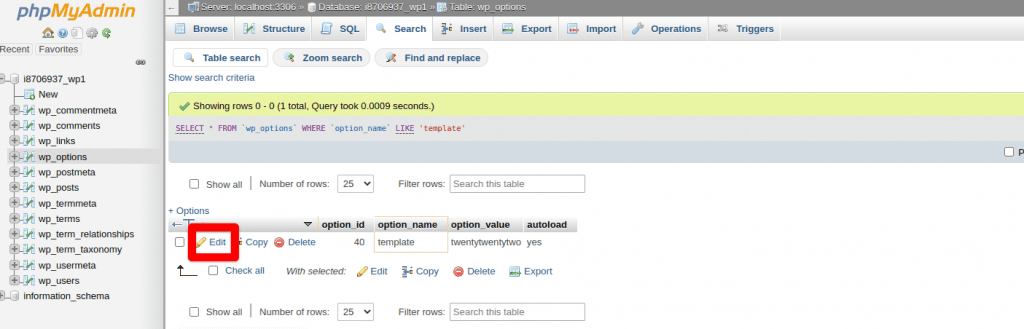
twentytwentytwoSelect Go after changing the option_value box and select Search again. In the Value box for option_name, type in template this time. You will see a similar looking row that will have your corrupted theme there. Same as the stylesheet, click the Edit button with the pencil icon and change the theme name to the same default WordPress theme used in the stylesheet:
The WordPress theme has now successfully changed without dashboard access. The website and dashboard will be accessible now, although the style will be different as the theme has changed. You can now log into the dashboard and upload a functional backup of your theme to get the site back to its prior working state.
php.ini file conflicts
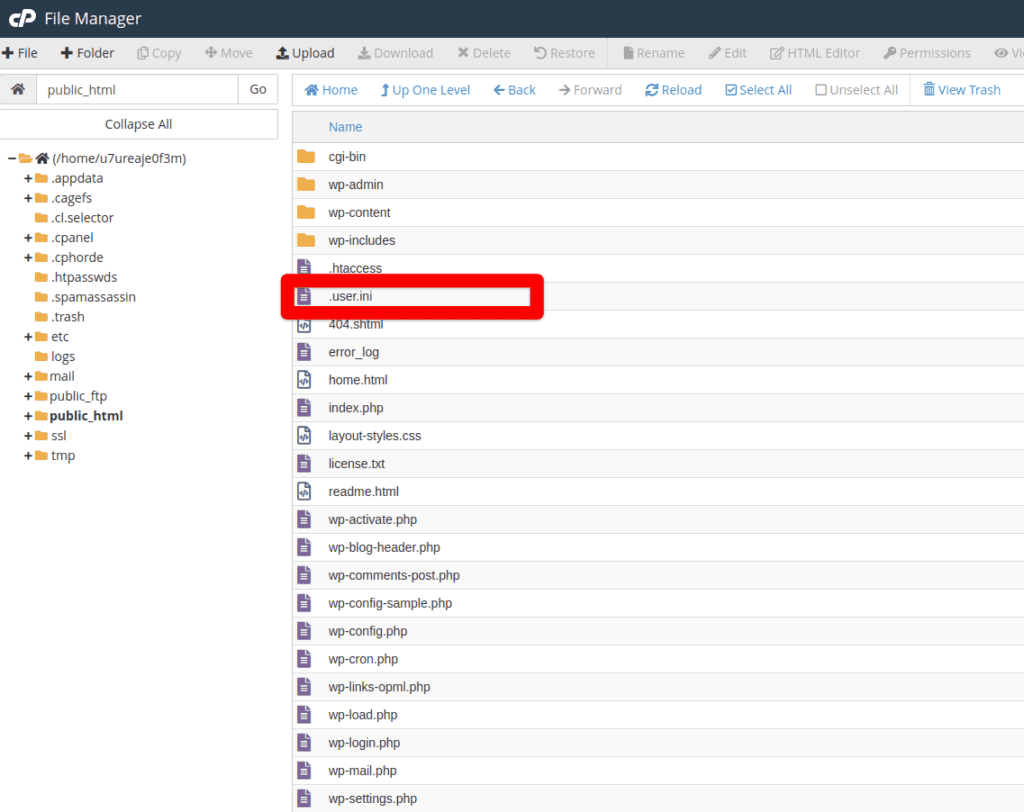
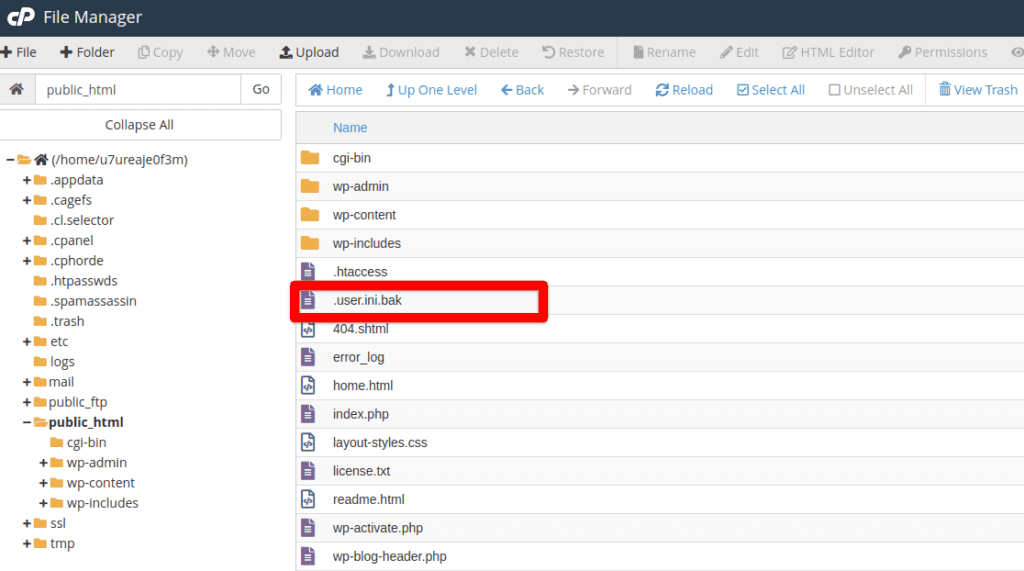
A configuration file for PHP is a file that controls variables to help run software and applications that require PHP. These files are called php.ini and .user.ini files. These files may have custom variable values to help run a WordPress site. For example, you may be using a theme that requires a minimum PHP memory limit of 256M, but the server your WordPress installation is on may have a default value of only 32M for its PHP memory limit. A php.ini file can then be created with a line of code in it to specify a higher memory limit of 256M. While these files are useful, there sometimes may be code that can cause conflicts with a WordPress site and can lead to a 500 Internal Server Error. This file is typically stored in the webroot of a WordPress site and can be named php.ini, .user.ini, and more. Here is an example below:
If the php.ini/.user.ini file within your WordPress installation is corrupted, it can be disabled to get the website back up. The file simply needs to be renamed to something different:
Load your site after renaming this file. You can then troubleshoot the code within this file further to examine for errors, or create a new one with different values.
.htaccess file conflicts
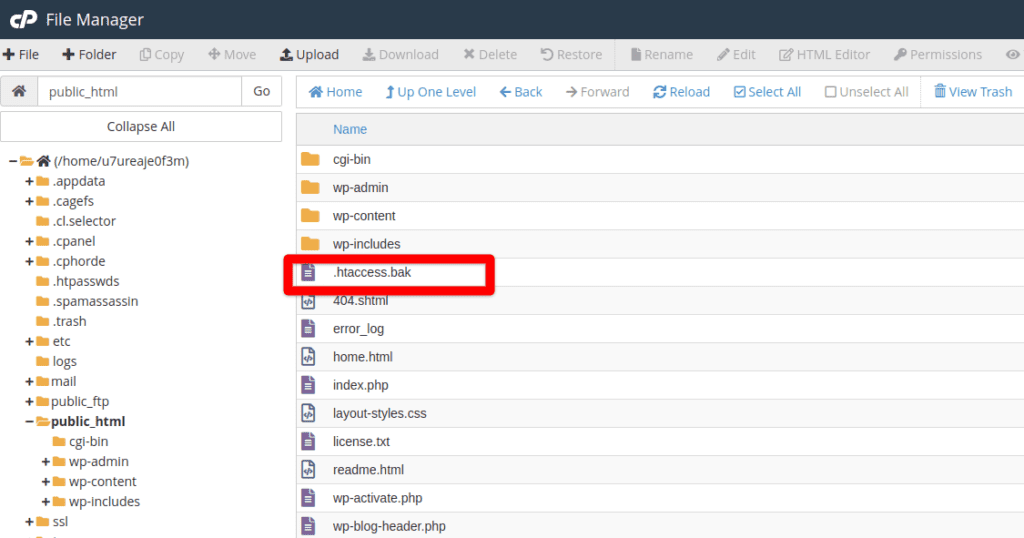
An .htaccess file is a configuration file for an Apache web server that contains special rules that dictates how a WordPress site behaves. There are many customization that can be done with this file to fit any website’s needs. An .htaccess file can be located anywhere within the WordPress installation and even above the webroot. While these files are powerful and useful for a WordPress site, they may also contain errors that could bring down your site and cause a 500 Internal Server Error, like so:
If the .htaccess file within your WordPress installation is corrupted, it can be disabled to get the website back up. The file simply needs to be renamed to something different:
Load your site after renaming this file. You can then troubleshoot the code within this file further to examine for errors, or create a new one with different values. Below is a default .htaccess file that can be created in the meantime to allow all pages on your WordPress site to load:
# BEGIN WordPress

RewriteEngine On
RewriteRule .* - [E=HTTP_AUTHORIZATION:%{HTTP:Authorization}]
RewriteBase /
RewriteRule ^index\.php$ - [L]
RewriteCond %{REQUEST_FILENAME} !-f
RewriteCond %{REQUEST_FILENAME} !-d
RewriteRule . /index.php [L]

# END WordPress500 Internal Server Error caused by corrupted core files
WordPress is composed of many core files that allow the front end and back end to load properly. These files stay consistent throughout each WordPress installation with the same release version. There can be scenarios where these core files become corrupted and cause a WordPress site to break and load to a 500 Internal Server Error. Some example scenarios include:
- Malware
- Failed WordPress upgrade
- Incomplete migration
- Failed restore
A corrupted core file may not always display when enabling DEBUG mode. Sometimes you may see an error within your error_log pertaining to a corrupted core file, like so:

Because these files stay consistent throughout each WordPress installation of the same version, a copy of the version you are running can be downloaded. You can then upload any core file to fix a corrupted one to in order to get a WordPress site working again. The most important directory that will NOT be replaced is going to be the wp-content folder, which contains unique data for your site.
It is important to backup a WordPress site before replacing any core files.
First, it is important to note down what version of WordPress you are running. There are two ways to find this information. Let’s review the first method of verifying a WordPress version.
METHOD #1 – Checking wp-includes/version.php
Every WordPress installation is composed of three main directories within its webroot. wp-content, wp-admin, wp-includes, like so:
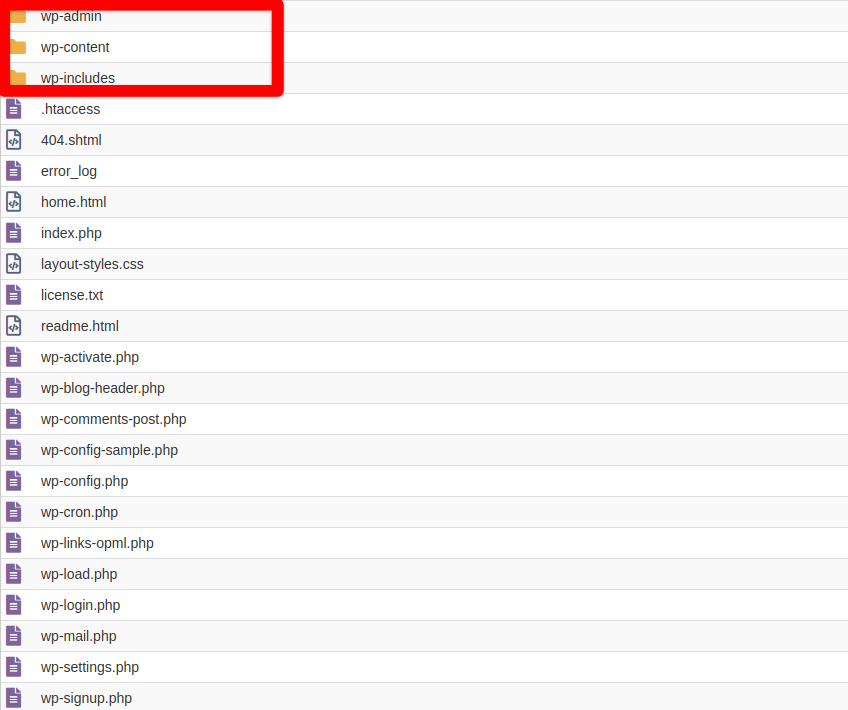
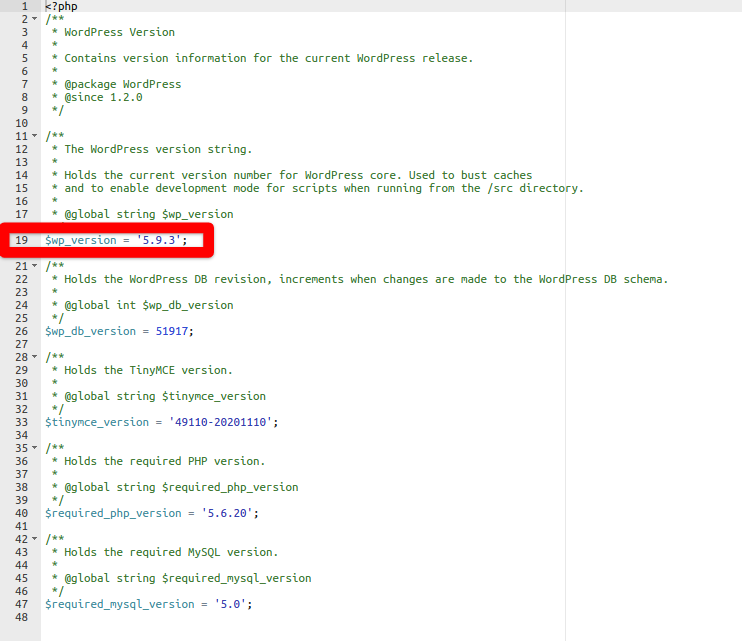
Open the wp-includes directory and scroll to the bottom of the file structure until you get to the file version.php. View this file with either a file manager or FTP client. The version number will appear on line 19. Here is an example:
METHOD #2 – Checking the db_version in the DB
Method #2 is a less common method and should be used if the wp-includes directory is corrupted and the version.php file is not accessible. You will need access to software that allows you to manage the WordPress database for Method #2. The two recommended pieces of software that allow you to do this are Adminer and PHPMyAdmin.
Adminer is one single PHP file that can be uploaded into your file structure to allow access to a WordPress dashboard.
PHPMyAdmin may already be installed on your hosting control panel configured by your hosting provider. For example, if you are utilizing cPanel for hosting, PHPMyAdmin can be found here:
Once you are logged in, you will see the WordPress database to the left like so:
Click the plus sign to the left of the database name, which will expand the database to display its tables:
Next, click on the database table named wp_options. Sometimes WordPress sites are setup to utilize custom database prefixes. The standard is wp_, but yours may be something different. The important part on this step is to make sure to click on the table that ends in _options.
After the wp_options table is selected, navigate to the Search functionality. Four search boxes will appear in the middle of the screen, like so:
In the Value box for option_name, type in db_version, then Go. You will then see a row appear with your WordPress version in the option_value field:
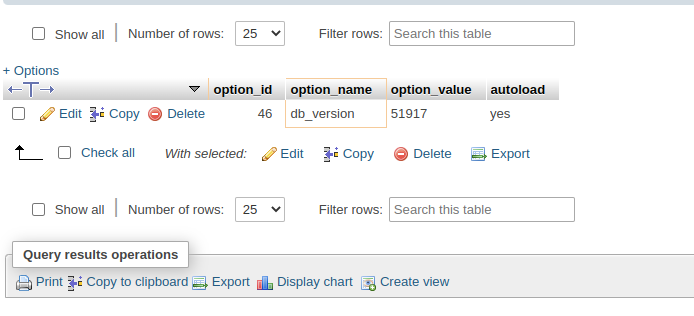
You can then copy the number in the option_value field and search online to find the applicable version of WordPress that matches your database. Relevant information can sometimes be found on the official WordPress support forum.
Download the applicable WordPress version
The next step is to download a copy of a WordPress installation that matches your WordPress version. Reliable and safe copies can be found directly on the WordPress website by going to the WordPress releases page.
Download a copy of the applicable version. Next, log into your file structure where your WordPress installation lives. If you know the exact core file that is corrupted, you can simply upload a fresh copy from the fresh WordPress install you just downloaded and overwrite the corrupted core file. If you do not know the core file causing an issue, begin replacing each core file until the site loads.
500 Internal Server Error Guide Wrap-up
We have now reviewed common reasons why a WordPress site may succumb to a 500 Internal Server Error. We have also reviewed ways to fix a WordPress site loading to a 500 Internal Server Error. WordPress sites are composed of many different working parts which can lead to this error being generated. Below are pointers if running into this issue:
- Review each troubleshooting method to get a WordPress site working again. You may need to perform multiple steps to get a site functional again. (Disable plugins & your theme for example.)
- When disabling a configuration file like an .htaccess file, check directories above your webroot and disable ones above too when troubleshooting.
- Sometimes a restore is the best option!