
How to Make a WordPress Backup
Having working and up to date backups are a must for every website owner. There are many things that can go wrong with a WordPress site, and there may be a catastrophic event that occurs that requires restoring from a backup if other options fail.
By making a full backup, you will have a complete copy of all WordPress site files and its database. The most crucial WordPress directory that needs to be saved is the wp-content directory. This directory contains all of the unique file content for the website. (Like images, plugin files, theme files, etc.) The rest of the site files are typically core files which can be replaced if absolutely necessary, although it is recommended to backup everything at once.
The database is also another important part of a WordPress install. This is where your website’s unique data for its pages and posts live, among many other things.
Making a complete backup will involve backing up the file structure and database. In this guide we will review how to make and save a backup to your computer so the option to restore if necessary is a possibility.
How to manually backup WordPress files
To backup your WordPress files, you will need to log into your hosting account where your site files live. There are many different hosting providers around the world. Some use software that allow users to download and modify files directly from the hosting server, while other hosting providers just provide SSH or FTP access to the server. We will review three common methods for backing up WordPress files:
1. Utilizing cPanel to make a backup
2. Logging in via FTP to grab the site files
3. Using SSH to zip files & save from a browser
Utilizing cPanel
cPanel is a leading software used by many hosting companies that allow easy access to many items within a hosting server, such as: File Manager, PHPMyAdmin, Email, and more. Creating a backup within cPanel of your WordPress site files is quite an easy task and involves just a handful of steps. There are two main methods used to create and download a backup within cPanel. Let’s review the first method:
Method #1: cPanel Backup Feature:
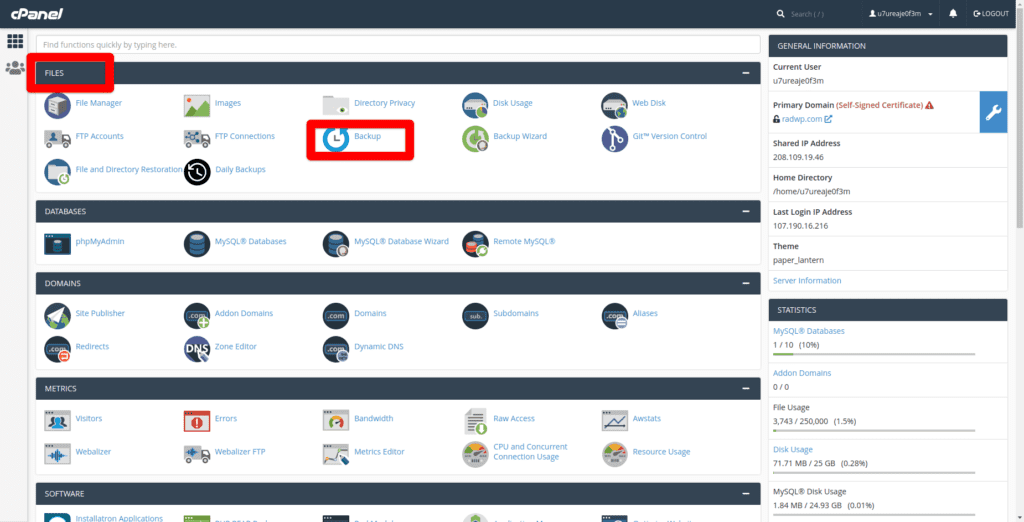
Log into cPanel and select Backup underneath the Files section:
After selecting the Backup section, download a home directory backup by selecting the Home Directory button underneath Download a Home Directory Backup:
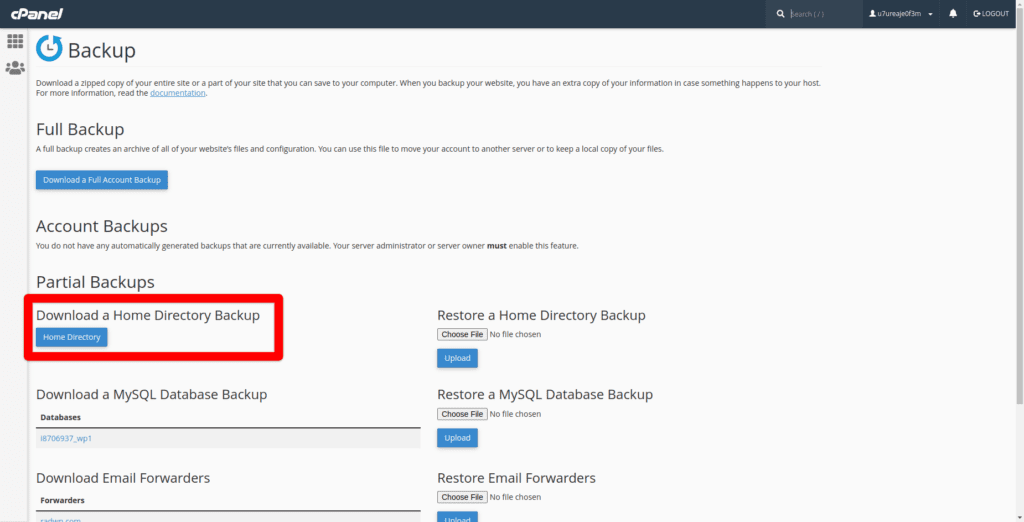
This will save a compressed copy of your entire home directory within your hosting account.
Method #2: cPanel File Manager:
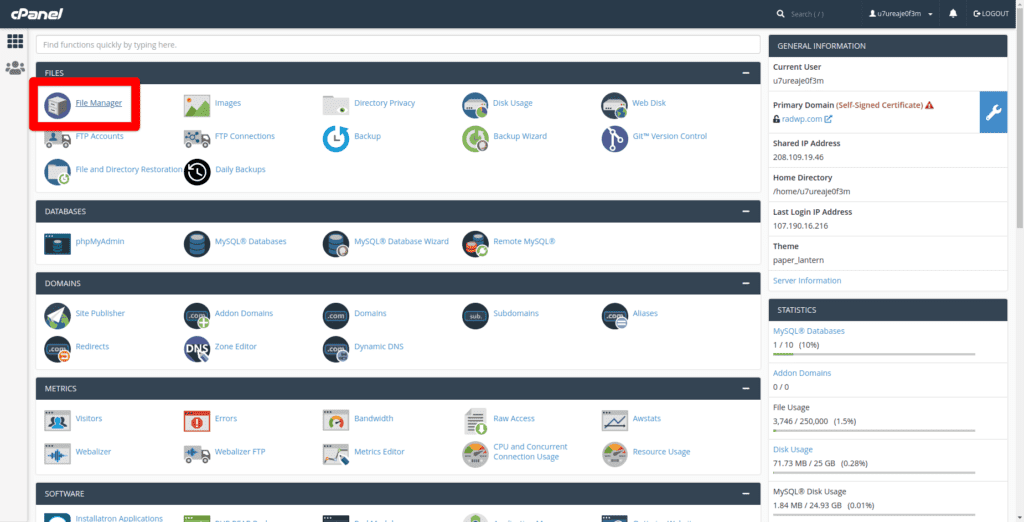
Log into cPanel and select File Manager underneath the Files section:
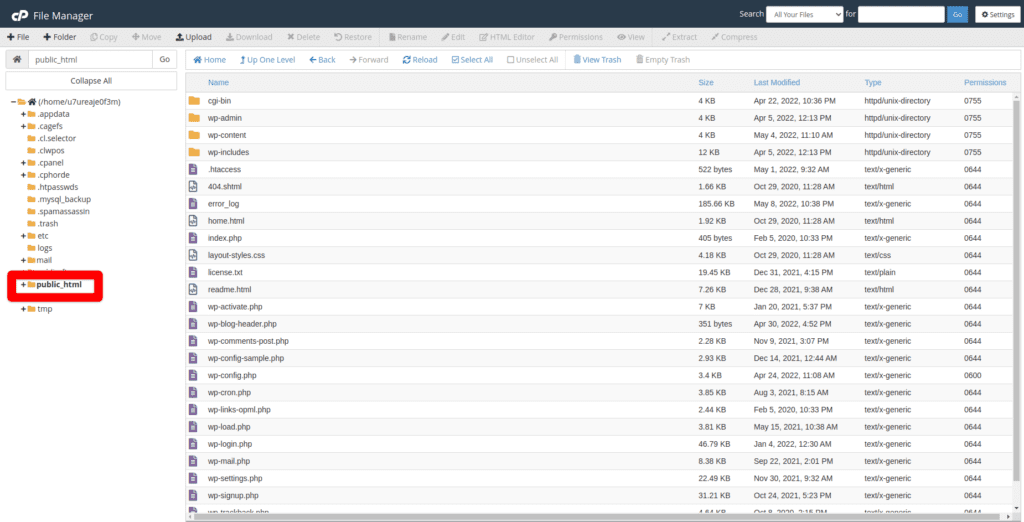
Enter into your WordPress site’s home directory. If you are hosting one website, this is usually located within public_html:
Click the Select All selection at the top to select all files within the present directory.
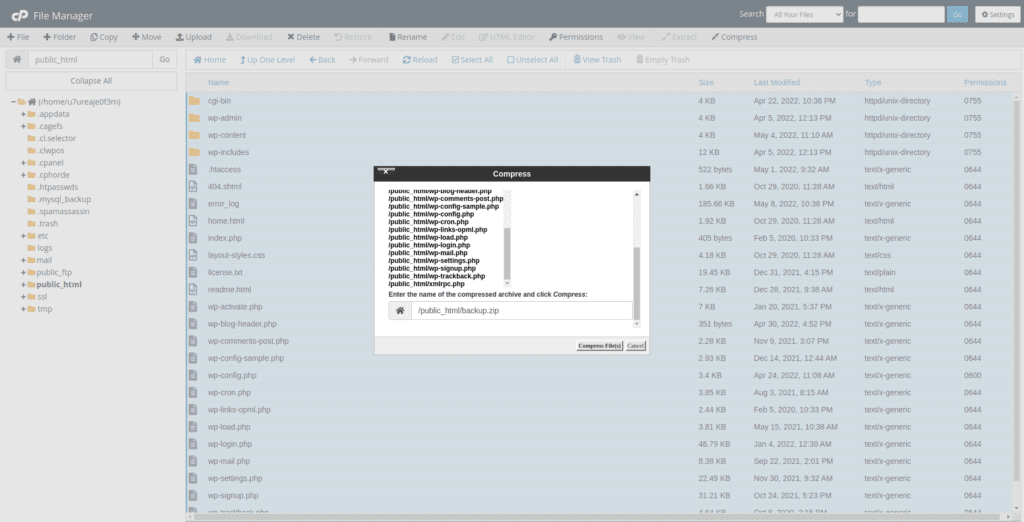
Right click the selected files and select Compress.
Select Zip Archive as your compression type and enter the name of your backup, like so:
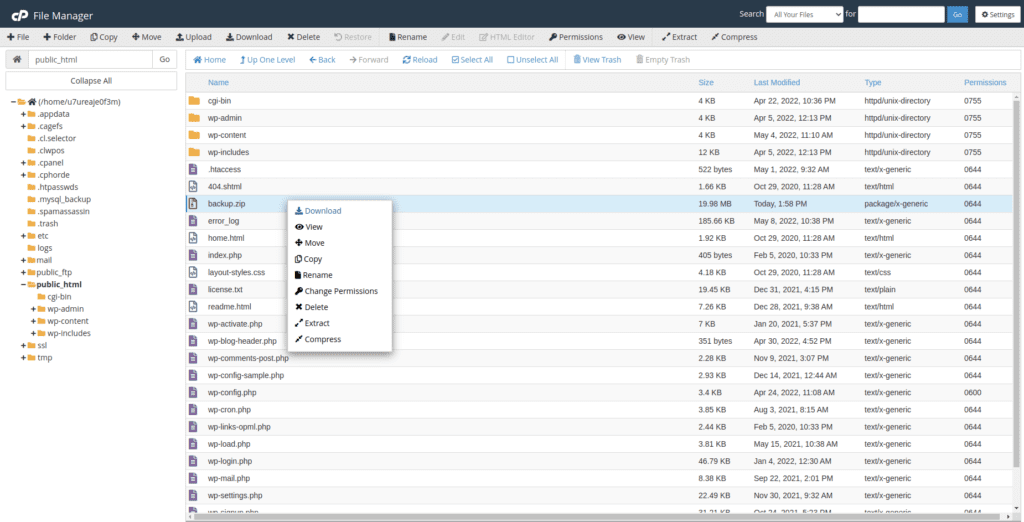
After the backup is compressed, right click the backup name and select Download.
Utilizing FTP
You can utilize this method if FTP access is the only access you have to the hosting environment where your WordPress site lives. You will need the following information and a working FTP client to log into a hosting environment:
- FTP Hostname:
- FTP Username:
- FTP Password:
- Home Directory:
- sFTP/FTP Port:
The FTP Hostname is a name assigned to the server that allows it to be differentiated from other servers/computers around the world. Just like each human being has a name, a computer/server does as well. If your website is live to the world, the fully qualified domain name can be used as the FTP Hostname. Sometimes, utilizing the domain name does not always work. For example, if the domain name is not actively pointing to the hosting server you would like to FTP into, it would not work. If your domain name is behind a Web Application Firewall, using the domain name will also not work. If this is the case, using the server’s IP address is the best option.
The FTP Username and Password will be either selected by you when you first set up a hosting server, or automatically generated by your hosting provider.
The home directory of your website will be found within your hosting environment. Common home directories include:
- public_html
- var/www/html
- httpdocs
If your website is configured as an add-on domain, it may be located in a sub-directory within the hosting server’s webroot. If you are unsure where your site’s home directory is located, your hosting provider may be able to point you in the right direction.
Using a FTP client to backup site files:
Once you have noted down the FTP Hostname, FTP Username, FTP Password, and Home Directory, open your FTP client of choice. We will be using the FTP client Filezilla.
Open Filezilla or your FTP client of choice and enter in the FTP Host, FTP Username, and FTP Password in the required fields. The default port for FTP will be 21 and sFTP will be 22. Your hosting provider may configure the port to be a special port. If 21/22 does not work, you will need to check with your hosting provider to see if they use a special port.

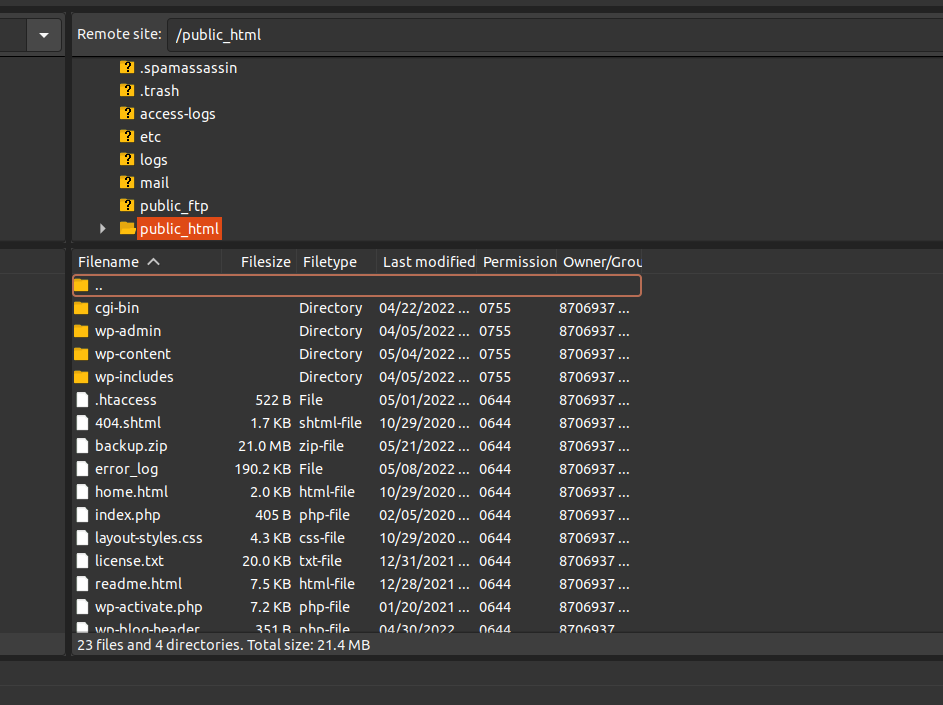
Once connected, you will see your site’s file structure to the right underneath Remote Site, like so:
To begin copying your site’s files, create a new folder on your computer and name it something relevant to your site that you will remember. You can create this folder directly in Filezilla. Right click within the Local Site section underneath Filename and select Create Directory:

Click into the Remote Site section underneath Filename and Control + A to select all files and directories:
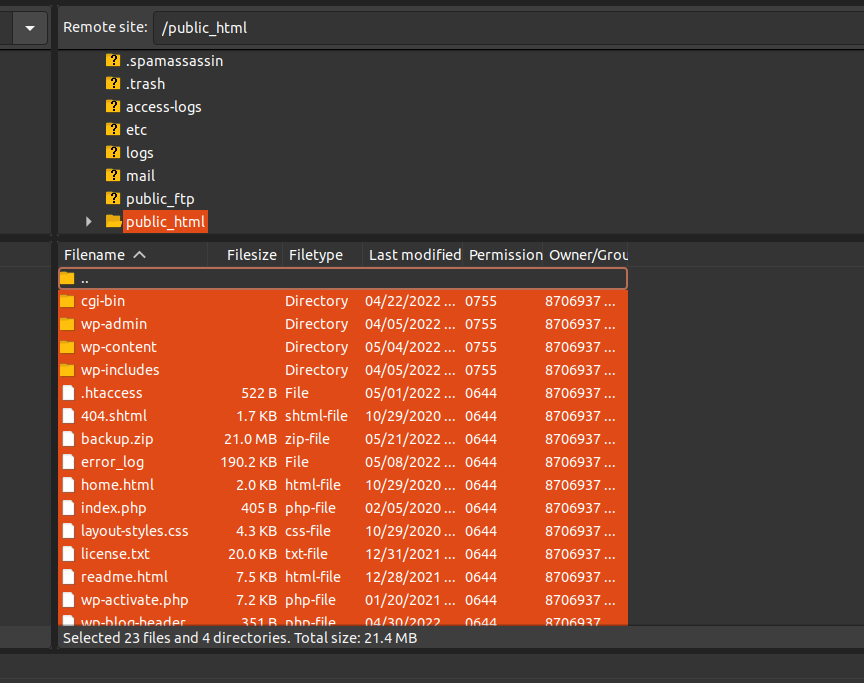
With all files and folders selected, drag all to the Local Site section within the new folder that you created earlier. This can take time – make sure to let Filezilla run until the process is finished.
Utilizing SSH
Utilizing SSH to download site files is an advanced technique that can be used if no other options are available. It is recommended to download a backup of your site via FTP or a FIle Manager if possible, as SSH requires more technical knowledge. More can go wrong if this method is done incorrectly.
To proceed with making a backup via SSH, you will need login credentials to connect to your hosting server. Here is what you will need:
- SSH Host
- SSH Username
- SSH Password
- SSH Port
- Home Directory
You will also need access to a terminal which will allow you to login via SSH. If you are using a Mac or Linux based machine, terminal will be built in to your computer. If you are using Windows, you will need to download software to allow you to use SSH such as Putty.
Once you have terminal running, SSH into your hosting server by using the ssh command, followed by the SSH username and SSH host:
If your hosting provider uses a special SSH port, simply change your command to the following, while replacing the 2222 in the example with your unique port:
ssh -p 2222 [email protected]Your terminal session will then prompt you for the SSH password. After signing in, navigate to the directory above your site’s home directory by running the following command:
cd /directory/above/home/directory Once you are in the directory above your site’s home directory, run the following command to zip all files and folders recursively:
zip -r backup.zip html Make sure to replace backup.zip with the name you want for your backup, and html for your site’s home directory.
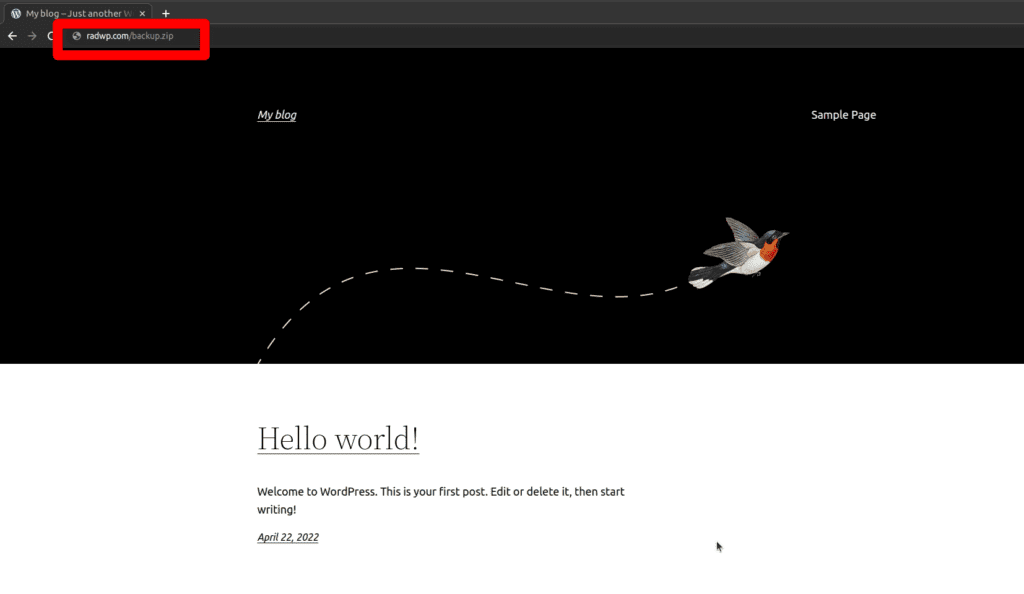
After this process is done, move the backup into your home directory so you can download it directly from your browser, like so:
mv backup.zip html/backup.zipYou can then access your backup directly through your browser by loading your website followed by the backup name, like so:
After downloading the zip backup from your browser, you can delete it from your server by navigating to the directory where the backup is located, then run the following command:
rm backup.zip Manually Backup a WordPress Database
To download a WordPress database, you will need to log into your hosting account where your WordPress database lives. There are many ways to download a database. We are going to review three common ways:
- Utilizing PHPMyAdmin through cPanel or Plesk
- Using the Database Backup functionality through cPanel
- Using Adminer by uploading via FTP
- Utilizing the mysqldump command via SSH
Utilizing PHPMyAdmin
PHPMyAdmin is software that is commonly installed by hosting providers that comes pre-installed with hosting control panels such as cPanel and Plesk. You can read more about PHPMyAdmin and download this software on their website.
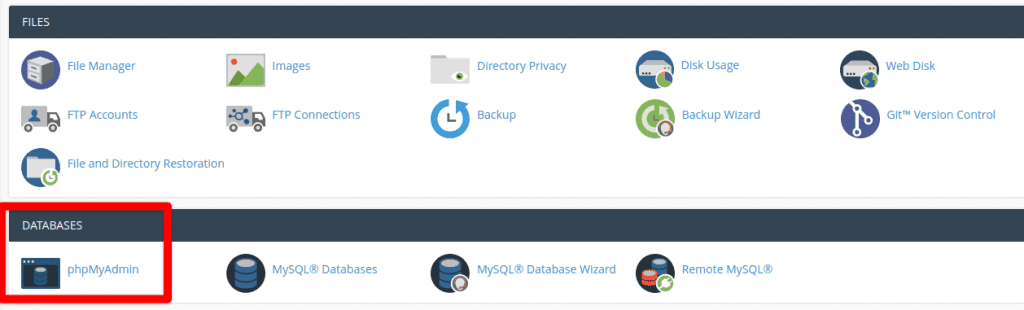
1. Using cPanel as an example, PHPMyAdmin can be found underneath the Database section:
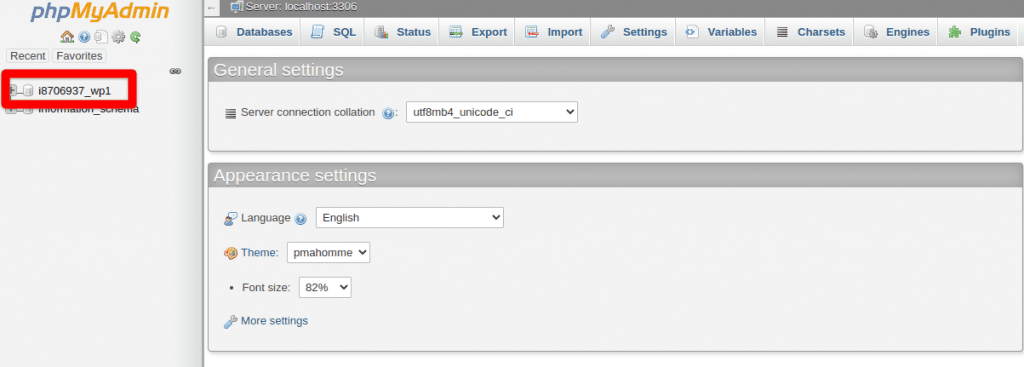
2. Once selected, click on the database name to the left, like so:
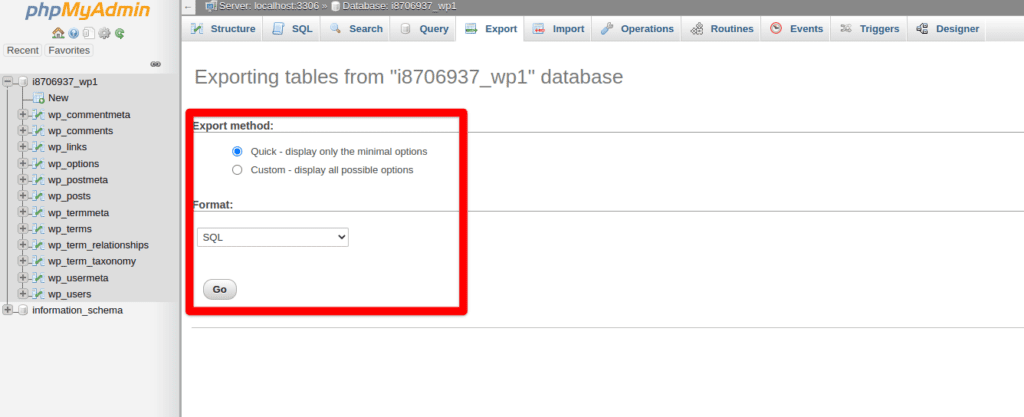
3. After the applicable database is selected, click on Export a the top:
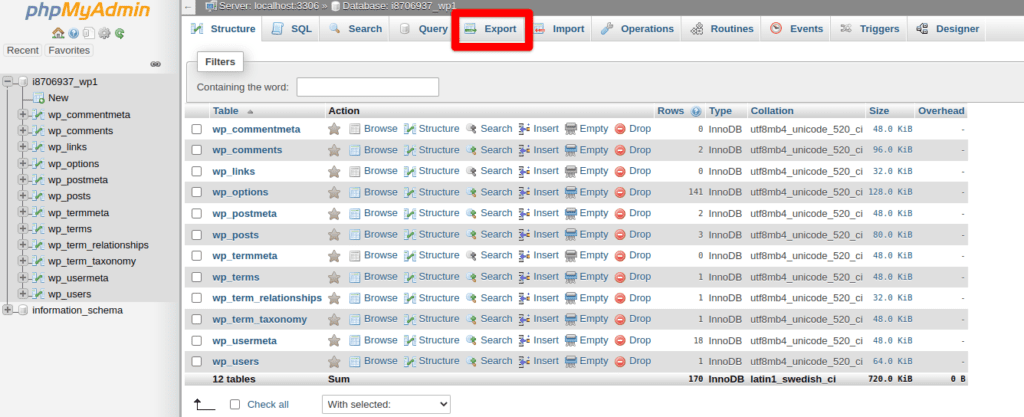
4. Select the Quick Export method with the Format SQL selected, then press Go. A SQL backup of your database will then be downloaded to your computer.
Utilizing cPanel
1. cPanel has a quick and convenient method for downloading a WordPress database. Log into cPanel and select Backup underneath Files:
2. After selecting Backup, click on the database link underneath Download a MySQL Database Backup:
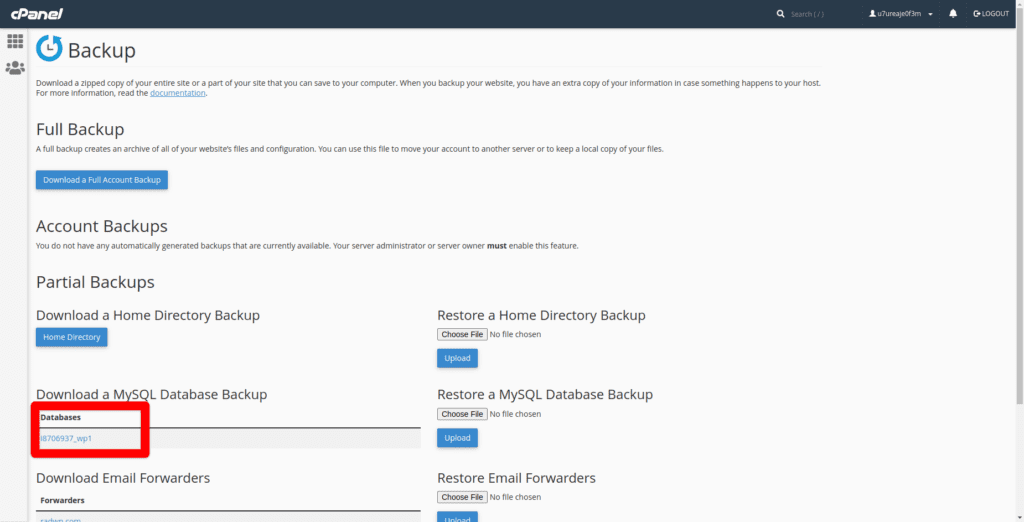
3. Once the database link is selected, a compressed copy of your WordPress database will automatically download to your computer.
Utilizing Adminer
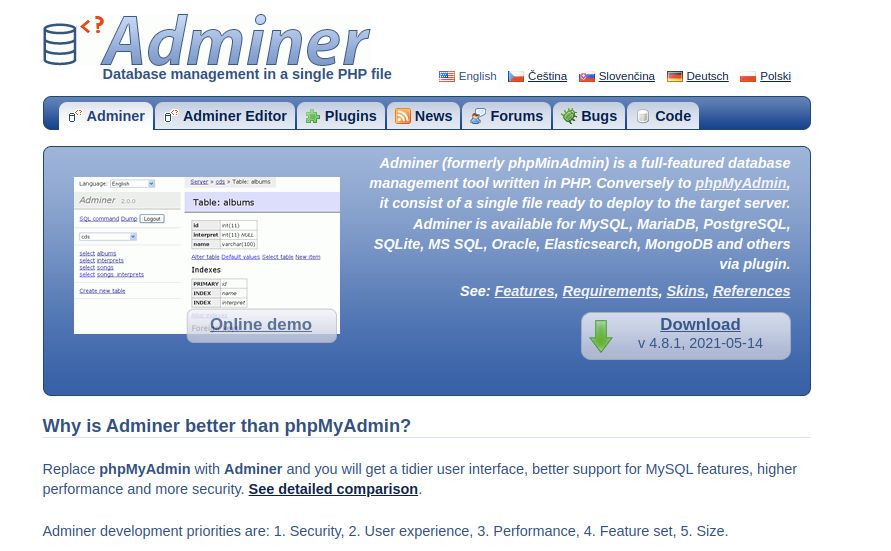
Adminer is a single PHP file that can be uploaded to your WordPress site and managed directly through a browser. Here are the steps to manage a database through Adminer:
1. Download the latest version of Adminer from their website.
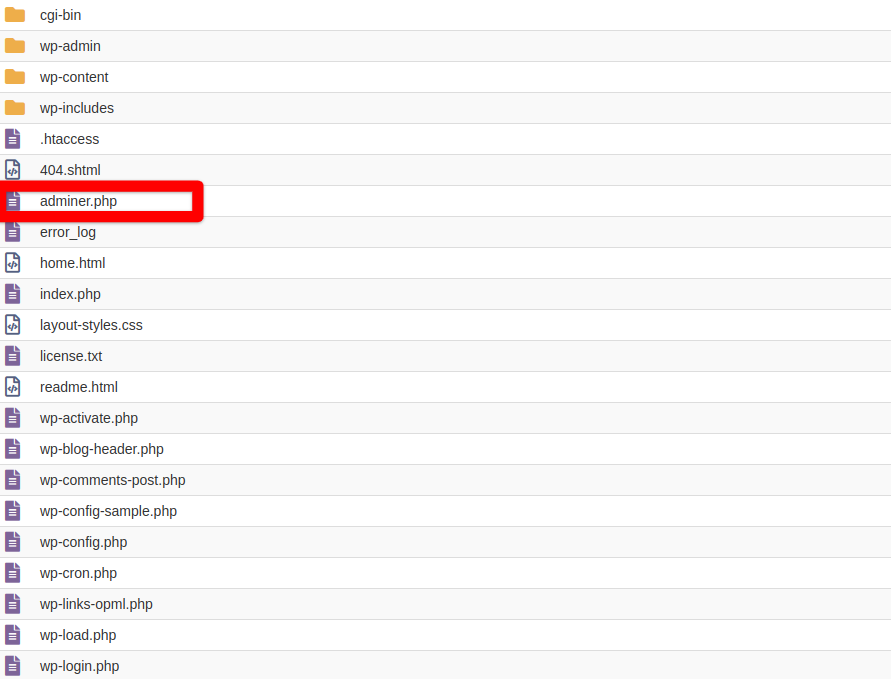
2. Log into your server and upload the downloaded PHP file into your site’s home directory like so:
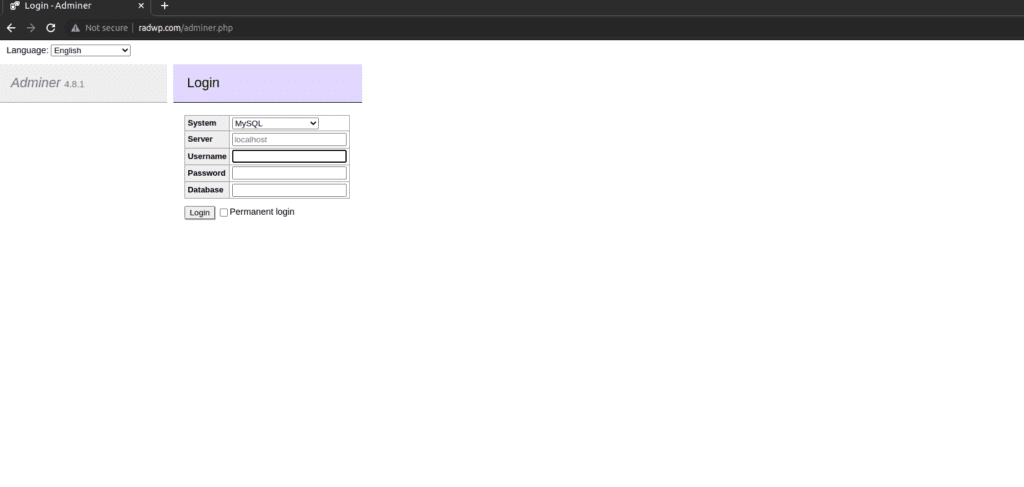
3. Load your website, followed by the PHP file name:
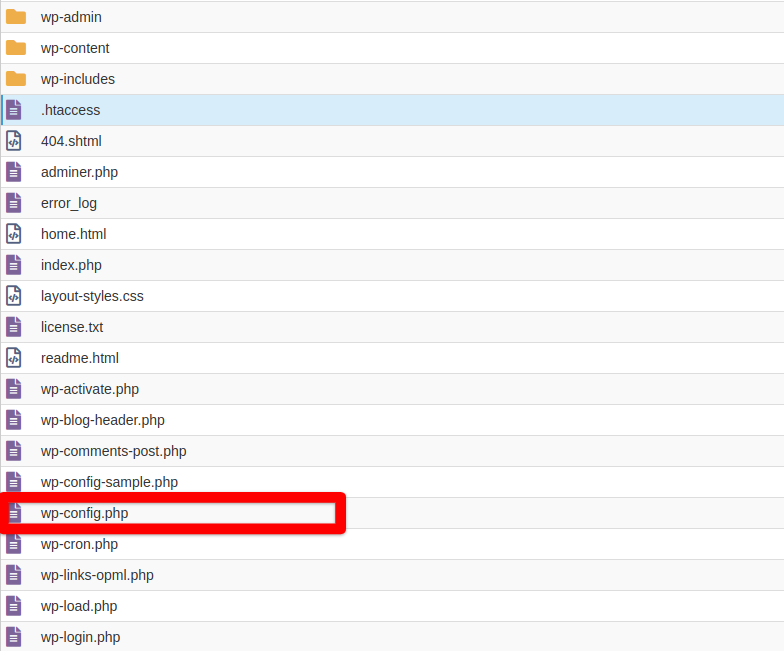
4. In a separate tab, load your site’s wp-config.php file. This file contains unique credentials that will allow you to manage your database through Adminer:
5. Enter each credential requested from Adminer to properly log in. The next page should look like this:
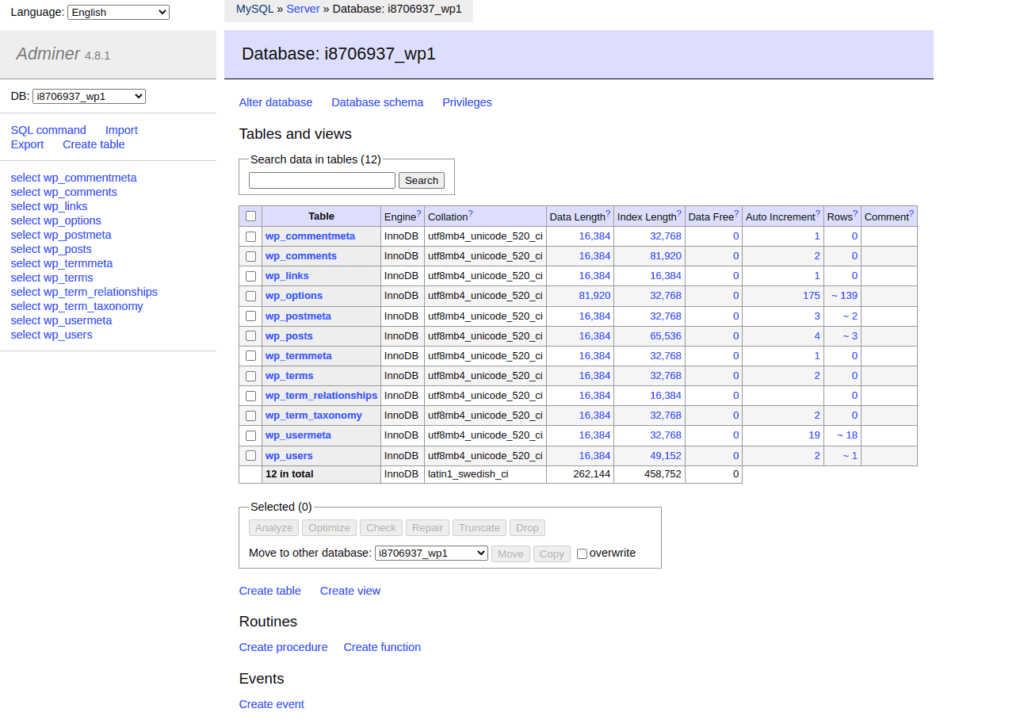
6. Select Export to the right. Once selected, change the Output from open to save and make sure the Format saves as SQL. Once those options are changed and all database tables are checked, select Export.

Utilizing mysqldump
mysqldump is a useful SSH command that creates a full backup of a WordPress database and stores it anywhere on the hosting server. We can utilize this command to create a MySQL backup of a WordPress database and download it directly from the website after moving it to the site’s webroot. This technique is more advanced than using software like PHPMyAdmin and Adminer; use at your own risk.
You will need to access your hosting server via SSH by using ssh command. You will also need the SSH Hostname, SSH Username, and SSH Password. You will also need a terminal to access a server via SSH. If you are using Linux or Mac, terminal will be built into your machine. If you are using Windows, you will need software to allow you to use SSH via a terminal such as Putty.
1. Once you have terminal open, log into your server via SSH like so:
If your hosting provider uses a special SSH port, change your command to the following, while replacing the 2222 in the example with your unique port:
ssh -p 2222 [email protected]2. Your terminal will then prompt you for the SSH password. After signing in, navigate to your site’s home directory by running the following command:
cd /path/to/home/directory3. Once you are located in your site’s home directory, you will now use the mysqldump command. Make sure to replace wordpressdb with your database name:
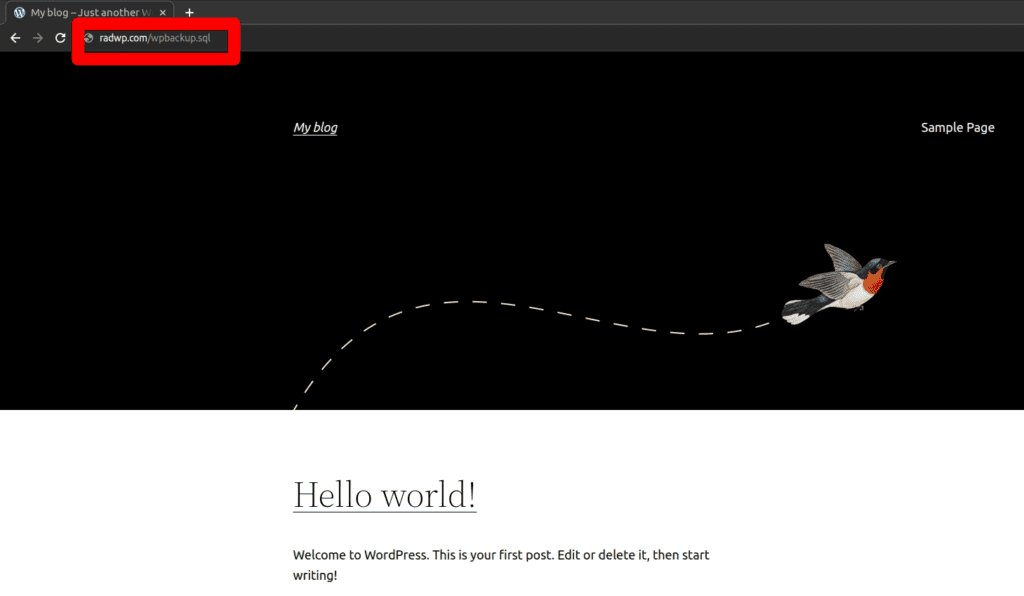
mysqldump -p wordpressdb > wpbackup.sql4. Navigate to your website followed by the SQL backup name in your browser. This will automatically download a SQL copy of your WordPress database onto your computer:
5. Make sure to remove the SQL backup after your download it by running the following command:
rm wpbackup.sql Backup a WordPress site with UpDraft Plus
UpdraftPlus is one of the most popular free WordPress plugins that backs up and restores a WordPress site. There are many useful features within this plugin that allows for backing up and restoring all of your site or parts of your site if you wish.
UpdraftPlus is a plugin and requires access to the WordPress dashboard to restore. It is possible to restore an Updraft backup manually, but it is highly recommended to keep a manual backup along with an Updraft backup in case the WordPress dashboard is inaccessible.
Utilizing UpdraftPlus
To backup with UpdraftPlus, first download the plugin from the WordPress dashboard. You can do this by selecting Add New next to Plugins at the top left of the WordPress dashboard, after selecting Plugins. Type in the keyword Updraft at the top right and you will see UpdraftPlus WordPress Backup Plugin as the first result:

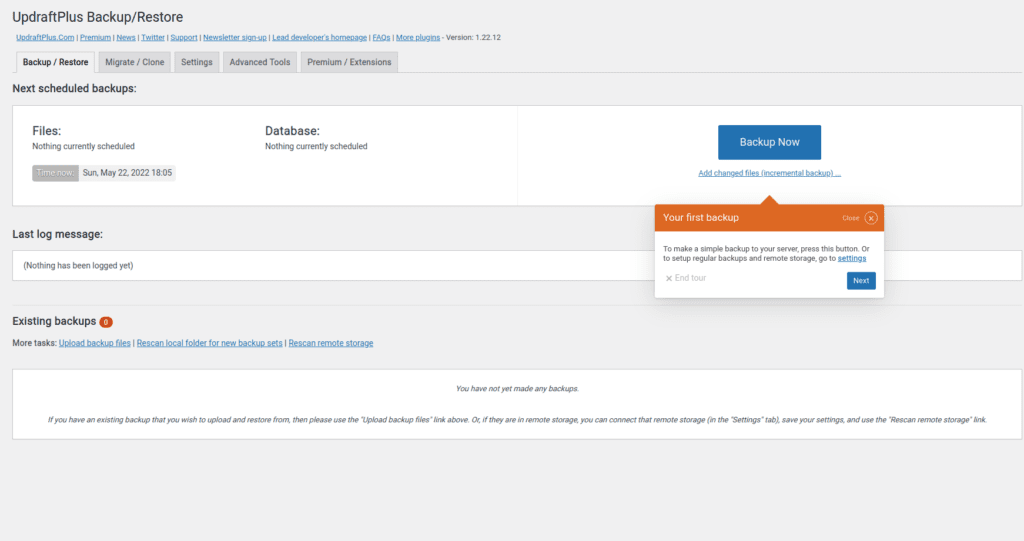
After installing, activate the UpdraftPlus plugin and follow the setup instructions that appear underneath the Plugins section of your WordPress dashboard. You will see a screen similar to this one:
Select the Backup Now button and allow the backup to run. If your website is large, this may take time. After the backup is finished, you will see your newly created backup underneath the Existing Backups section, like so:
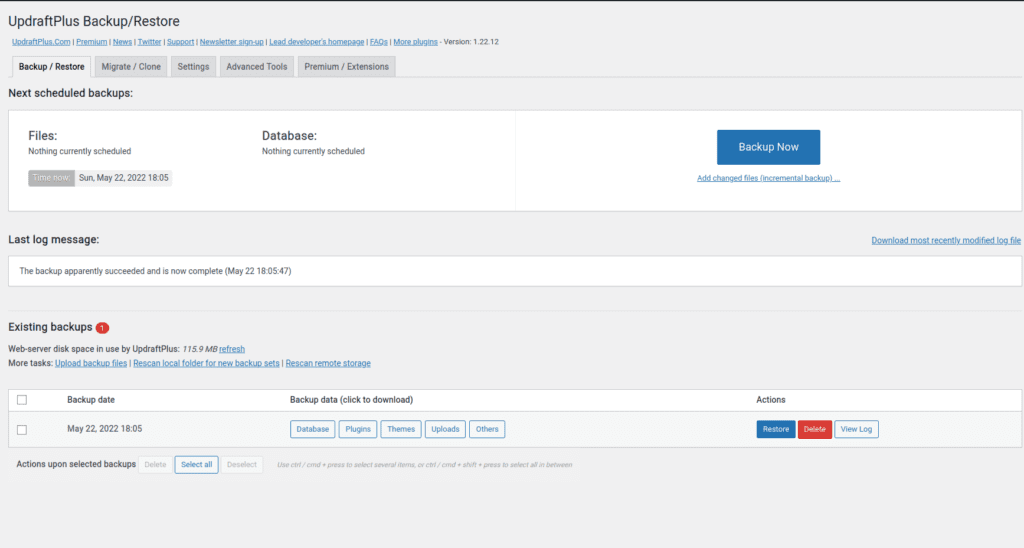
You can then select parts of the backup to download to your computer. It is recommended to download all Backup data components to have a full backup saved.
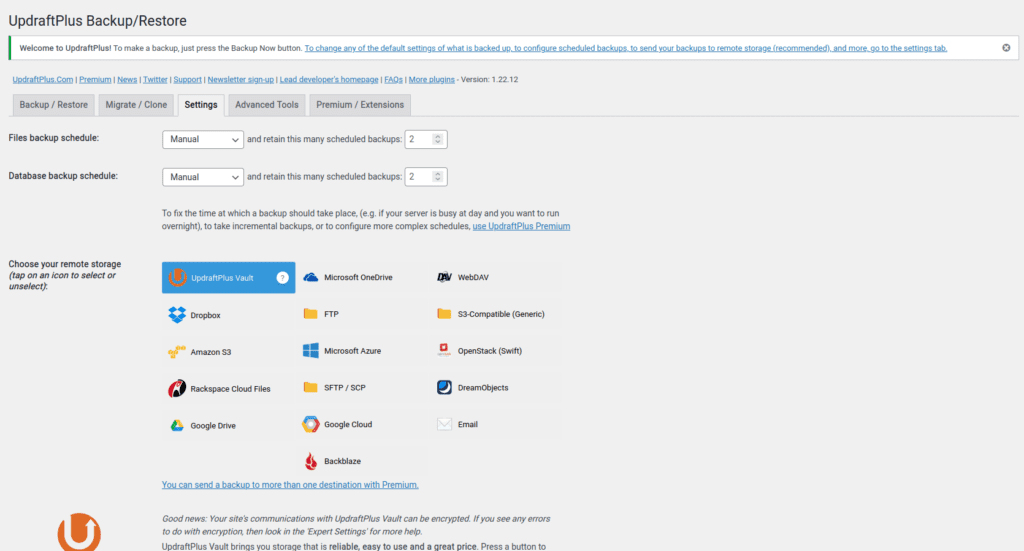
You can also setup a backup schedule through this plugin to backup to a variety of remote storage options. Simply go to the Settings tab within the plugin to setup a backup schedule:
Backup Guide Wrap-up
We have reviewed how to make a WordPress backup a variety of different ways, both manually and through a plugin in the WordPress dashboard. After reviewing this guide, make sure to remember the following tips when backing up your WordPress site:
- Make sure to take a full backup of your site, which includes the files and database. The most important files to backup are the ones located in the wp-content folder in the webroot.
- Verify your backup is functional in a testing environment. It could be catastrophic if you think you have a reliable backup when it turns out it doesn’t function properly.
- Create a backup before making large changes to your site, like major software updates or large content changes.